BigQuery
This article outlines the steps necessary to set up BigQuery as a GrowthLoop destination and begin exporting audiences for activation.
Requirements
To connect the GrowthLoop application to BigQuery, we need the following:
- Access to a BigQuery Data warehouse
- Google Cloud service account (and its account key saved as a JSON file)
If you already have a service account and have stored its key as a JSON file, you can skip to Setting BigQuery as a Destination.
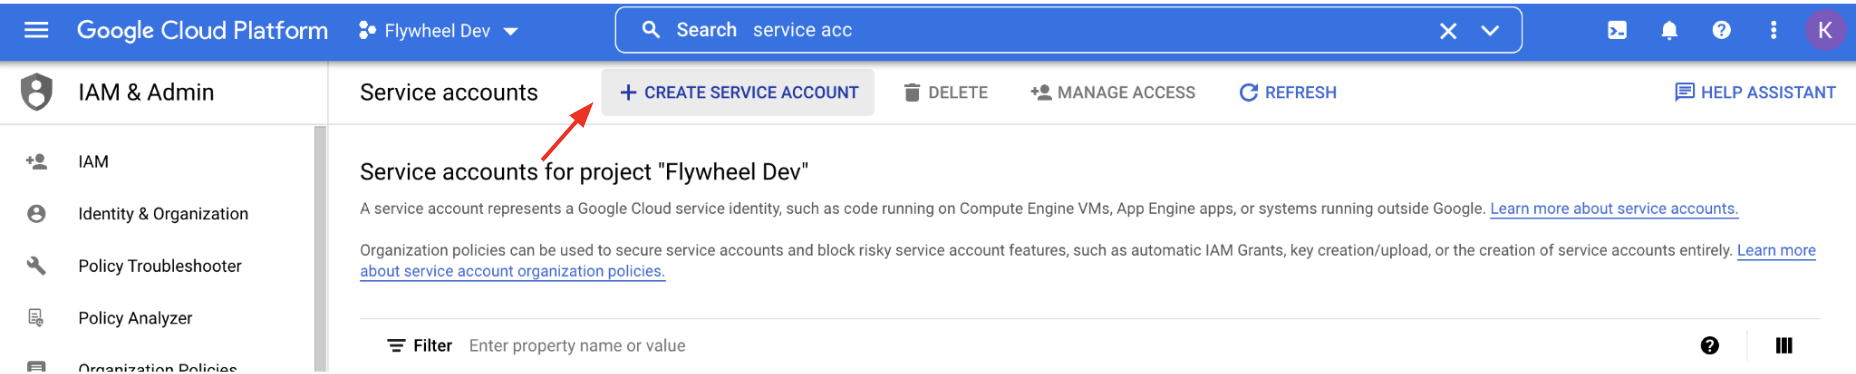
Creating a Service Account
In order to create a service account for your project, you will need the serviceAccountAdmin and BigQuery Admin permissions. If you are unsure whether you have these permissions, check with your Google Cloud Platform administrator.
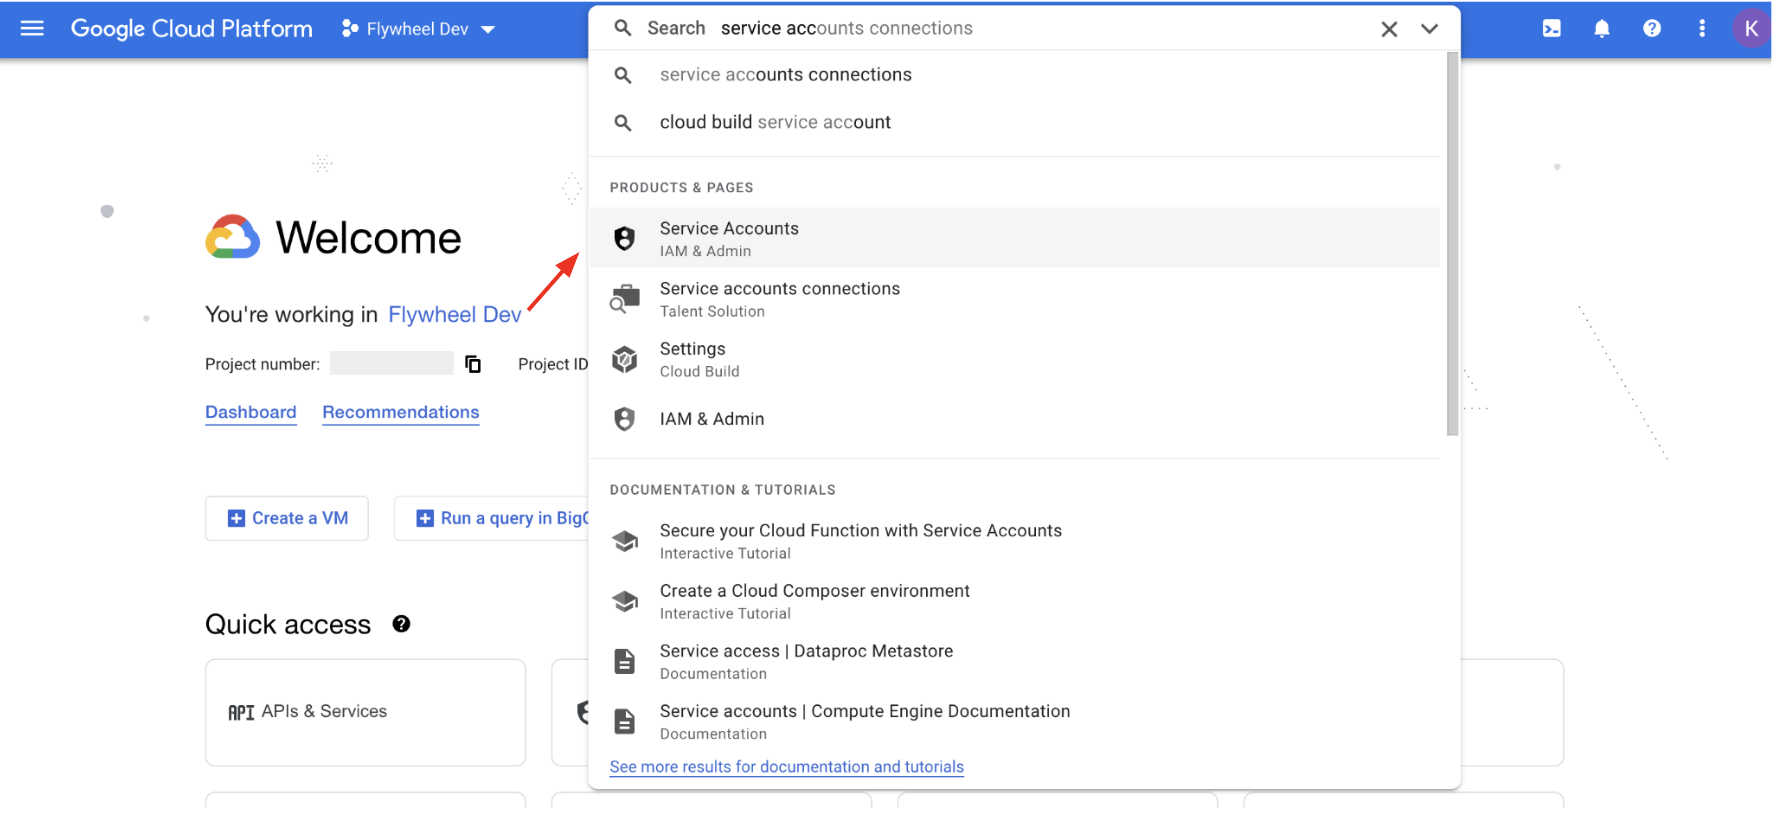
From the GCP homepage, use your quick search bar to find Service Accounts.
Choose Create Service Account.
Provide identification and description details for your service account, then click Create and Continue.
- Service Account Name: A descriptive name for your service account. If your name includes multiple words, separate them with dashes.
- Service Account ID: GCP will auto-populate this field. Below it, an email address associated with your service account will appear.
- Service Account Description: A short description of the purpose of your service account.

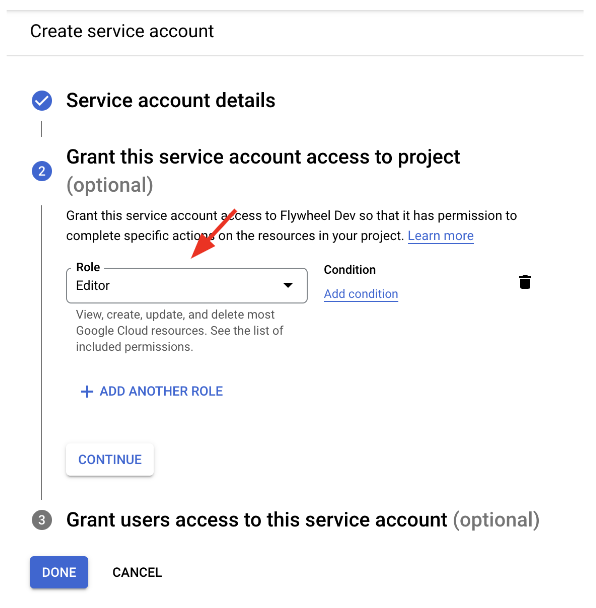
Grant your service account access to your project with the Editor role and click Done.
Finding Your Service Account Key (JSON)
JSON keys are files that allow external services like GrowthLoop to engage with your service account. If you already have a JSON key for your service account, skip to Setting BigQuery as a Destination. If you do not, create a new one using the steps below. Save your JSON key file in a safe and memorable place - this key is not recoverable, and you will need to create another if you lose it. You have a limit of 10 keys per service account.
To create a key, you need to have administrative privilege over keys for your project. If you receive a permissions error during the key setup process, ask your Google Cloud administrator to either 1) provide you with key creation permissions, or 2) create the key themselves and provide you with the JSON.
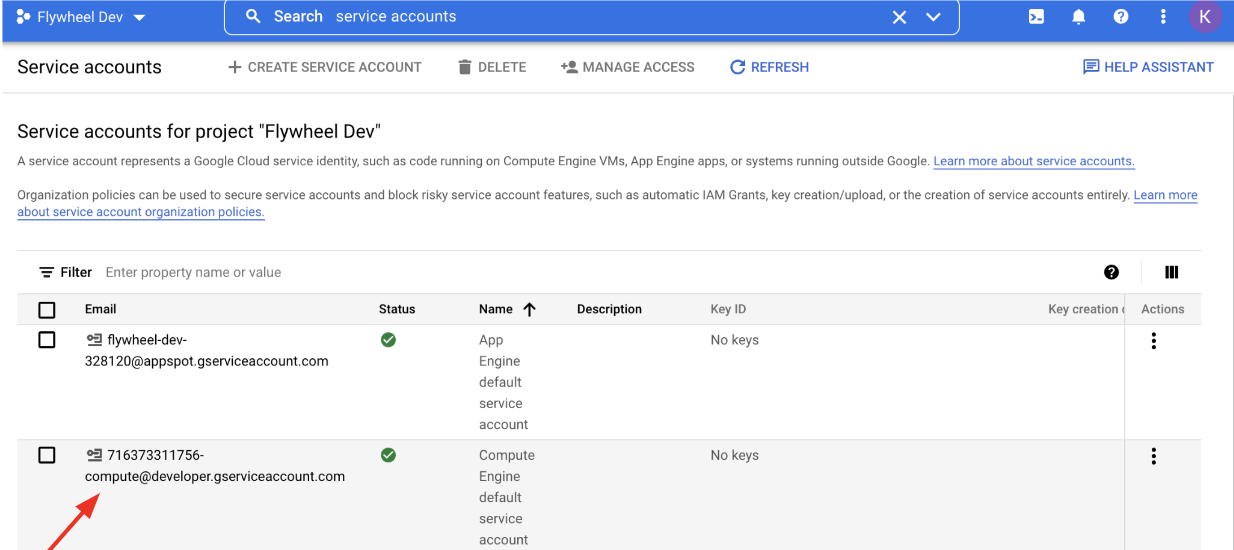
First, log in to your Google Cloud Platform account. In the Search bar, type “Service Accounts” and select Service Accounts from the dropdown.
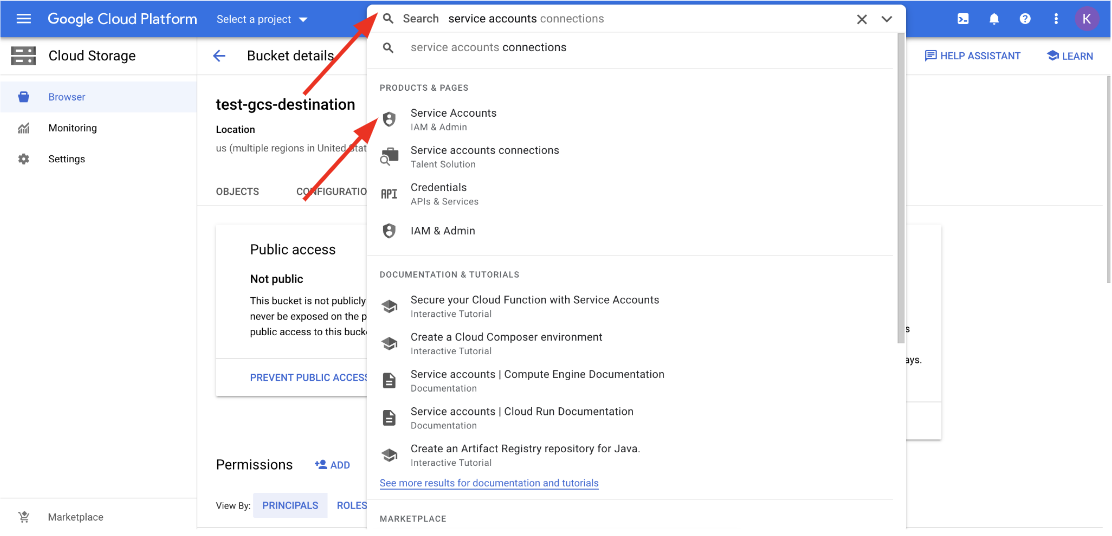
Find and click into the correct service account.
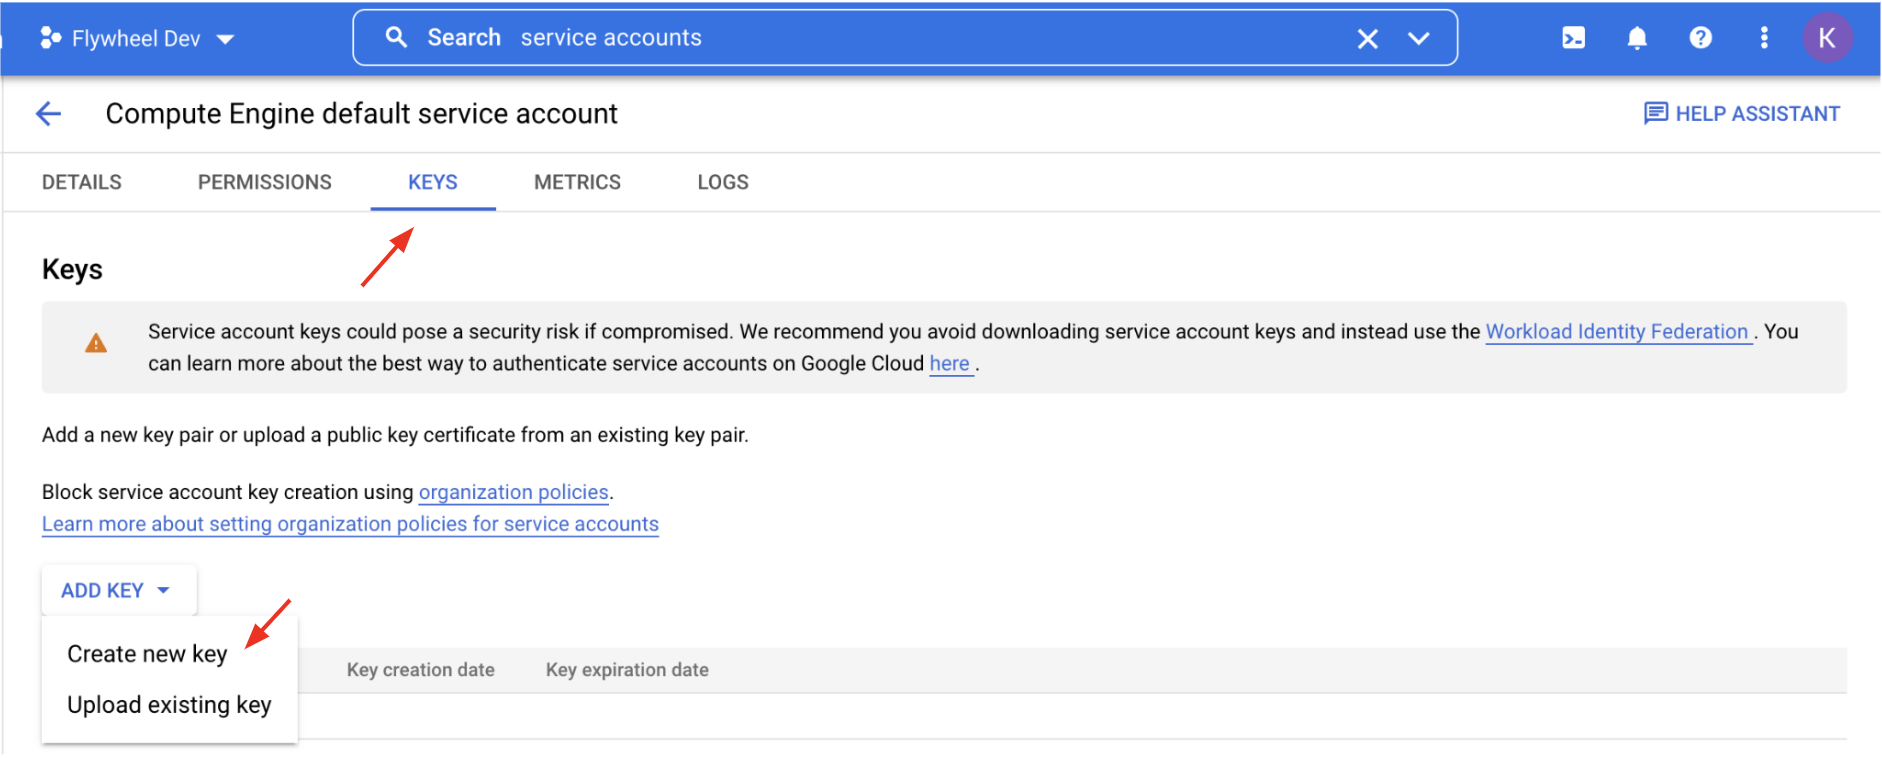
Navigate to Keys. Choose Create New Key from the Add Key dropdown.
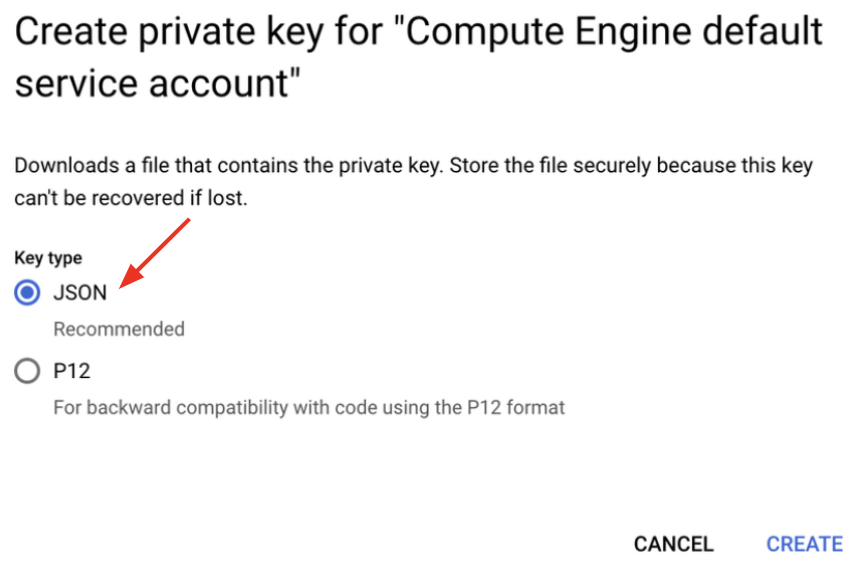
Select JSON and click Create. The new key file will automatically download to your computer as a JSON file. Save the file in a secure, memorable place.
Now that you have a service account and service account key, you are ready to set BigQuery as a destination!
Setting BigQuery as a Destination
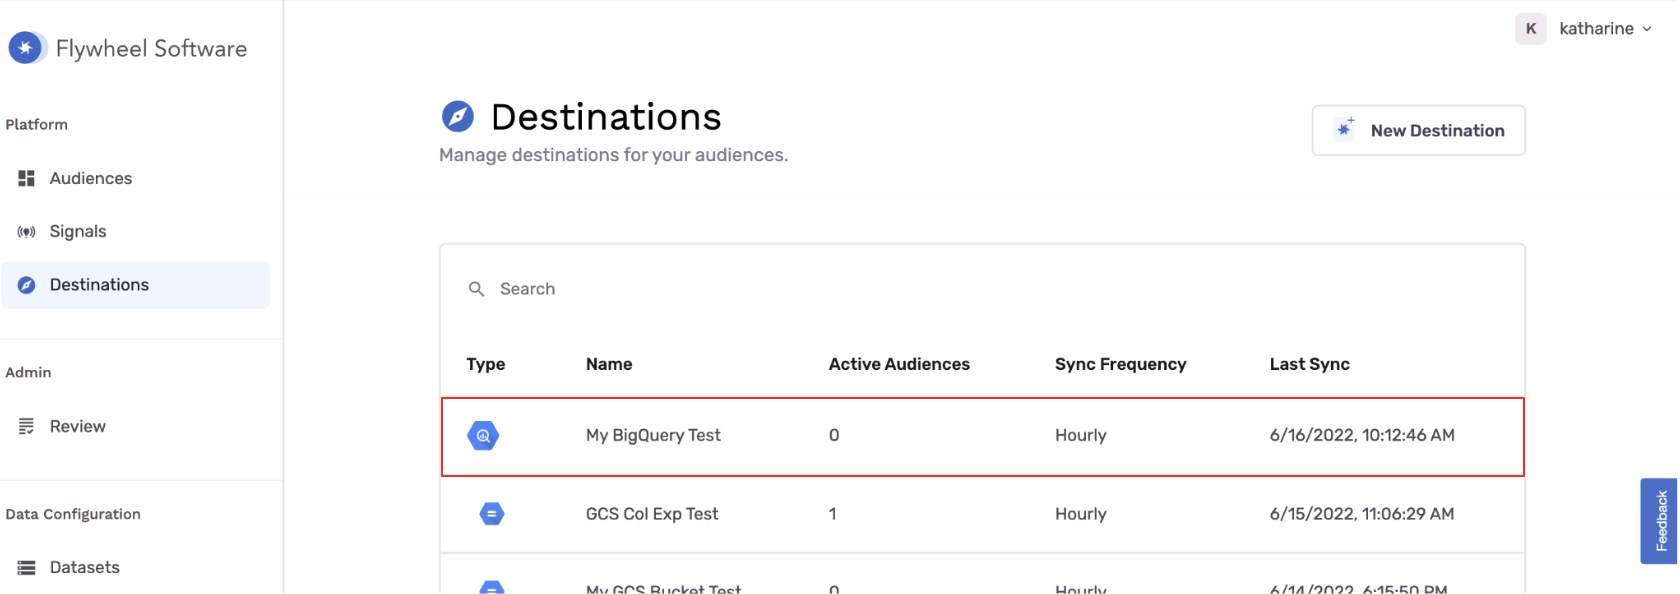
Select Destinations from the left rail of your GrowthLoop home screen.

Click NewDestination on the top right.

Scroll down to the Data Warehouse section and click Add BigQuery.

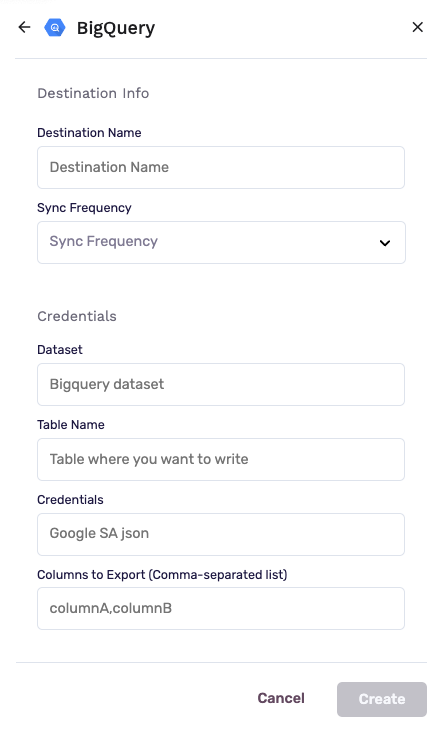
A modal window will prompt you to fill out Destination Info and Credentials.
- Destination Name: A custom name for your destination.
- Sync Frequency: The frequency at which GrowthLoop will export audiences to your destination (hourly or daily).
- Dataset: The BigQuery dataset where you want your new table to live.
- Table Name: A name for the table GrowthLoop will create in BigQuery.
- Credentials: Copy and paste the entire contents of your JSON key file here.
- Columns to Export: Columns that will be exported by default when you export an audience to BigQuery. Use the column names of the underlying datasets in your data warehouse. If you do not specify any column names, all columns will be exported by default.
Click Create. You are now ready to begin exporting to your Google Cloud Storage destination! You can confirm that BigQuery is connected by clicking Destinations on the left rail.
Exporting to BigQuery
When exporting to BigQuery, you will be prompted select an Export Type and Personalization Fields.
- Export Type: Choose between Export All Records and Export Updates (Deltas).
- Export All Records: Each time your audience exports, a new record is created for every member of the audience.
- Export Updates (Deltas): Each time your audience exports, a new record is only created for new members of the audience.
- Personalization Fields: By default, GrowthLoop will export only the columns specified during destination setup (called Columns to Export). If you would like to add any additional columns to your export, do so here.
After exporting, your table will appear nested within the dataset you specified during destination setup.
Updated 3 months ago